Perhaps just looking to upgrade your stopping power?
Whichever it is, you're in the right place, keep reading for a step by step guide to replacing the rear brake discs and pads!

This post may contain affiliate links. Please read my disclosure for more info.
Tools Required
- Jack
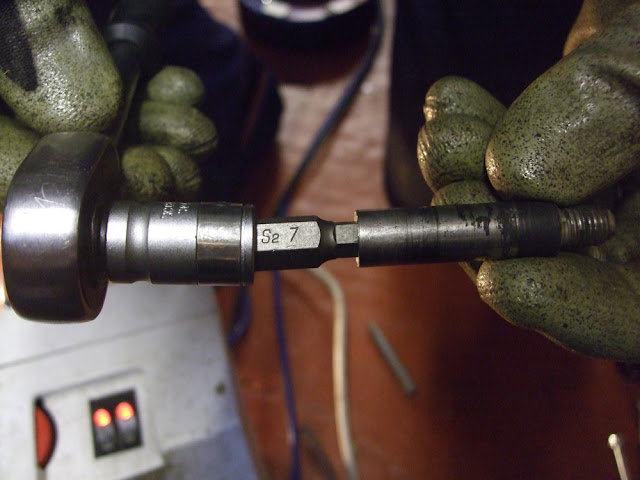
- 7mm Allen Hex bit socket
- 16mm socket
- 17mm socket
- Locking wheel nut bit
- Torx T40 bit socket
- Ratchet
- Flat Head Screwdriver
- Wire brush (optional for cleaning)
Parts Required
- Brake Pads - OEN: 34216761240
- Brake Discs - OEN: 34216864052
- Inner M8 Hex Bolt - OEN: 34211161806 (if you lose yours, or round the head off...)
- Wear Sensor - OEN: 34351164372
Note: the part numbers above are for the 330d only, please double check compatability with your specific car!
I also couldn't find the Pagid ones I used at Amazon, Parts in Motion or Autodoc UK oddly, so I've linked to the option I'd choose instead.
Disclaimer: Any information given in this guide is to be used at the readers own risk. I take no responsibility for injuries to the reader or damage to their vehicles. If this guide is followed correctly, no harm should occur to either the reader or the car. If followed incorrectly it could cause injury or damage to the car.
Please read through the entirety of this guide prior to undertaking any work, and do take care when following this guide.
How to Replace BMW E46 330d Rear Brake Discs and Pads
Step 1
Crack the nuts on the rear wheels using your 17mm socket. Then get the rear end jacked up safely on stands. Fully remove the wheels once jacked up, which should leave you with this.
Step 2
Taking a flat head screw driver, lever off the clip on the brake caliper. It can take a bit of doing, but just persevere, trying not to slip with the screw driver as you could cause unwanted damage to various components.I also decided to give my clips a wire brushing whilst they were off, just to clean them up a tad.


Step 3
Next take your Torx T40 bit and crack the fixing on the discs to the hub. It shouldn't take much effort, but you might need to hold the disc to stop it moving.
Step 4
Working behind the caliper now, prise the two fur tree plastic caps off of the caliper pin sockets. It shouldn't take much effort, you should be able to do it by hand, if not carefully use a flat head screw driver.

Step 5
With the caps removed, take the 7mm Allen bit socket and remove the two calliper pins. You might need to tease them out of the rubber surrounds with a screw driver on the thread from the side.
Once removed the caliper will pull away, if the discs are significantly worn it might take a little bit of force to pull the pads over the lip or build up on the outside of the discs. Rest the caliper safely on something, do not let it hang.
You might want to clean the caliper up while you have it off too, mine were pretty well caked in brake dust and grime. Make sure to avoid damaging the piston gaiter though!
Before

After

Caliper removed

Step 6
With the caliper removed, still working behind the brake set-up, take the 16mm socket and undo the two set screws fixing the carrier to the hub. These will be tight so it will take quite a lot of force.

When the set screws are removed the carrier will just come away from the disc. Again, you may wish to clean the carrier up, mine was caked up with crud pretty bad.


Step 7
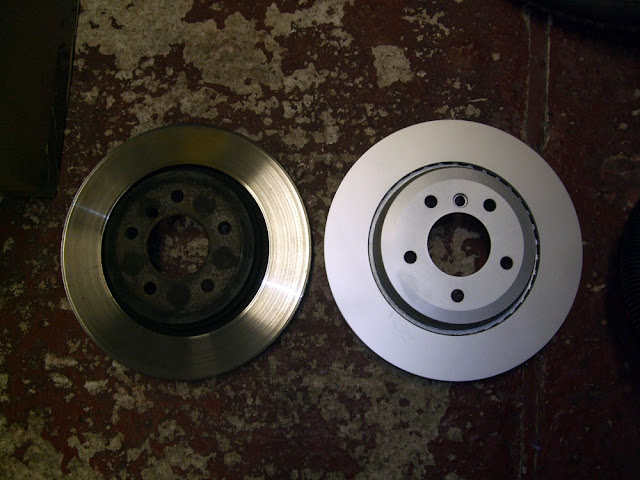
Fully undo the screw holding the disc to the hub, which was cracked earlier with the T40 Torx bit. The disc should then pull away. It might be ceased on so could require a bit of persuasion by way of a tap with a rubber hammer.As mine were so low I decided to weigh them, to see just what difference 4mm reduction in material makes. Turns out the old discs were 6.1kg and the new ones 7.2kg. So that's over a kilo per disc gone in material.


With the disc removed it should look like this.

At this point, if you want to replace your handbrake shoes, you can follow my how to replace E46 handbrake shoes guide then come back here once you're done.
Step 8
Take your new disc and put it on the hub, replace the Torx head screw and tighten it hand tight for now. Also replace the carrier, making sure the 16mm set screws are very tight.
Step 9
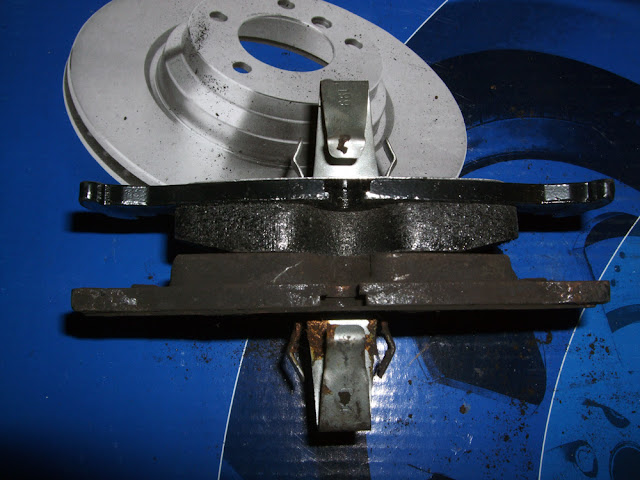
Using a G-Clamp, compress the piston in the caliper. Keep an eye on the brake fluid level under the bonnet, don't let it overflow or rise too high. Once compressed, put your new brake pads in. Note, you will have to replace your pad sensor, or swap the old one to the new pads as long as the warning light hasn't illuminated on the dash.Here's a comparison of the old and new pads.


Step 10
Refit the caliper and tighten the retaining pins using the 7mm Allen bit socket, replace the fur tree type caps and then finally replace the caliper clip. Also make sure to tighten up the Torx head screw in the disc, ensuring the disc is properly seated.You should now have a shiny new brake set-up, something like this.

All that now remains to do is replace the wheels and lower the car back down.
Pump the foot brake to re-adjust the pads to the discs. You should expect the discs and pads to have to bed in before they are at peak performance.

6 Comments
The car breaks looked to old and rusty. Anyway, nice tutorial you have.
ReplyDeleteTo be honest, you are probably right, but at the time of replacing everything I didn't have the parts to replace the whole brake system (or the money!).
DeleteFollowing the work above though, the brakes work perfectly and it passed the M.O.T comfortably so they can't be too shabby.
Thanks for the compliment on the tutorial.
Best regards,
Andy.
Excellent write up! This is just what I was looking for, thanks for posting online to help others
ReplyDeletethis really helped a lot coz it was eazy for me to do it and it only took me 1hour to change both.and dont forget to press the pistin using G-clemp tool.
ReplyDeleteDid you not use silicone grease on the slide pins?
ReplyDeleteHi there,
DeleteI can't recall what I used on this specific job, but it was probably Comma Copper Ease or Granville Red Rubber Grease. Having just researched the best product to use on guide pins, there seems to be a lot of debate on which product is best. Some people stating Copper slip will seize your calliper, wear away the rubber boots, or gum up and block the guide pins going back in (I've never had a problem on any of my cars using it), some people suggesting using nothing at all, and others saying to use red rubber grease. I think it's worth me taking some time to investigate properly and update the article.
Thanks for the comment!
Cheers,
Andy.
Post a Comment
Let me know what you think by leaving a comment below.