Use this guide to learn how to replace your E46's handbrake shoes, and adjust the handbrake to make sure your 3 series passes it's next MOT.

This post may contain affiliate links. Please read my disclosure for more info.
Parts Required
- Parking brake shoes
- For 316, 318, 320, 323, 325, 328 models
- For 330 models
- BMW P/N: 34416761292
- Meyle 314 042 0007
- Expanding lock (if required)
- P/N: 34416851439
- Replacement spring kit (comes included with the Meyle kits linked above!)
- P/N: 34410410825
- Adjusting screw (if required)
- P/N: 34416851437
The list above contains the genuine BMW part numbers, so you can order direct from BMW if you wish.
If you want to save money though (like me), I've included links to alternatives on Amazon.
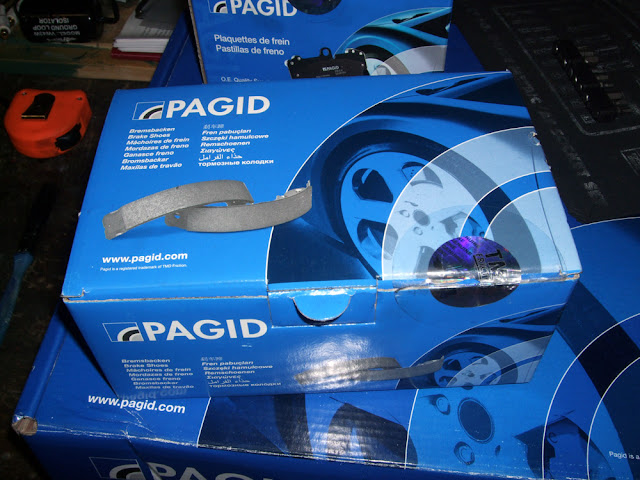
I picked up a set of Pagid parking brake shoes for £32.40, they don't seem to be available on Amazon any more but these Meyle ones are, and they're cheaper too!
Note that the above link is for 330 models only, if you have any other model, e.g. 316, 318, 320 etc. get this Meyle set.

Tools Required
- Jack
- 10mm long socket
- 7mm Allen Hex bit socket
- Allen keys
- 16mm socket
- 17mm socket
- Locking wheel nut bit
- Torx T40 bit socket
- Ratchet
- Flat Head Screwdriver
- Pliers
- Wire brush (optional for cleaning)
*Disclaimer: Any information given in this guide is to be used at the readers own risk. I take no responsibility for injuries to the reader or damage to their vehicles. If this guide is followed correctly, no harm should occur to either the reader or the car. If followed incorrectly it could cause injury or damage to the car.
Please read through the entirety of this guide prior to undertaking any work, and do take care when following this guide.
Step 1
Crack the nuts on the rear wheels whilst the car is on the floor, you will need a 17mm socket and your locking wheel nut tool.Step 2
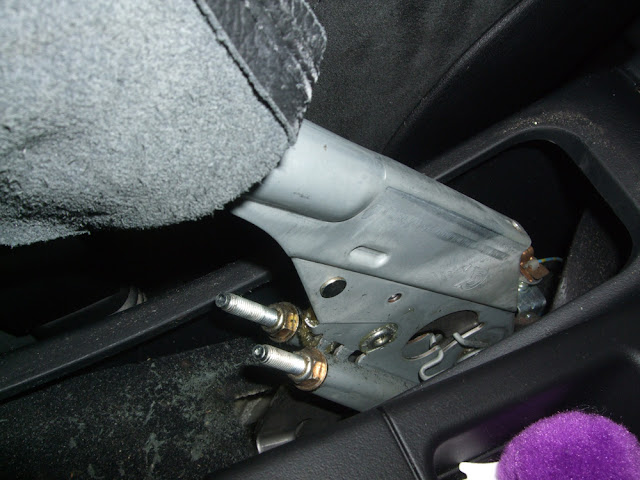
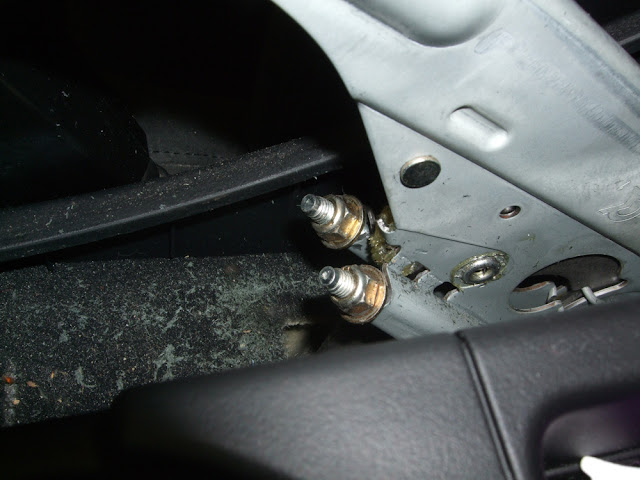
Jack the car up and remove both rear wheels. Moving to the inside of the car, pop the handbrake lever gaiter off (it simply unclips with a bit of moderate force) and pull it forward. Using a 10mm long socket, undo both lock nuts until the cable is obviously slack, check by pulling on it.
Tight
Loosened
Step 3
Please follow steps 1 - 7 in my E46 Rear Brake Discs and Pads Replacement guide, to see how to remove the rear discs and pads, before continuing with step 4 of this guide.Step 4
With the rear brake caliper, carrier, and the disc off you should be left looking at the parking brake assembly.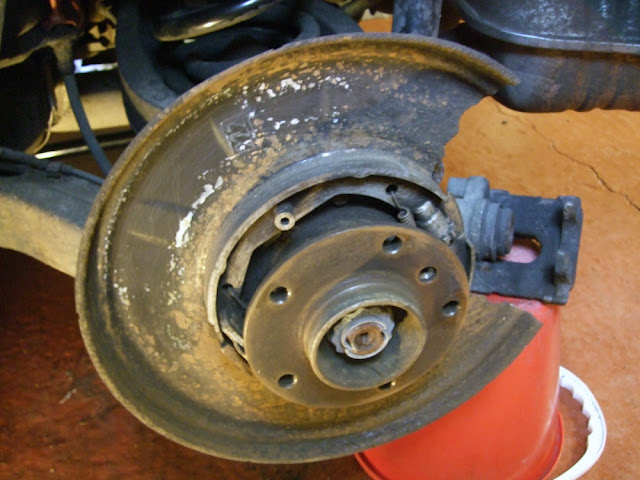
Mine was a lot dirtier than this, but I took a wire brush to it so I could see the assembly more clearly.

Step 5
Using an Allen key (I forget which size) remove the quarter turn spring fixings holding the brake shoes to the hub. Simply turn the fixing 90° and they should just pull out.

Step 6
With the two spring fixings removed, pull the two brake shoes apart and remove the adjusting screw.
You should now be able to remove the springs holding the two shoes together, you might find using pliers helps. Once you have removed the springs, the brake shoes will come away.
Step 7
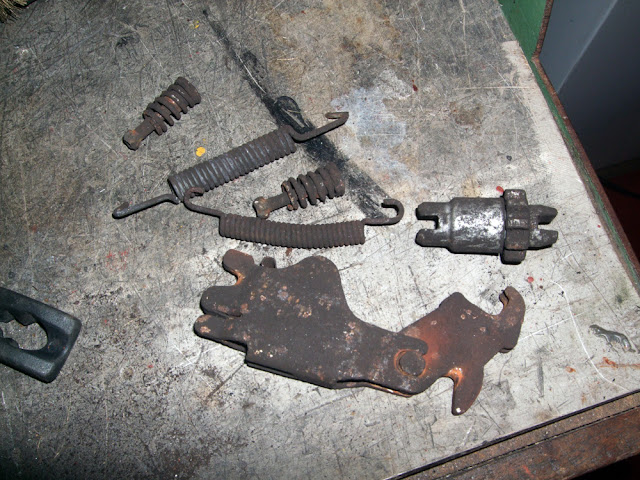
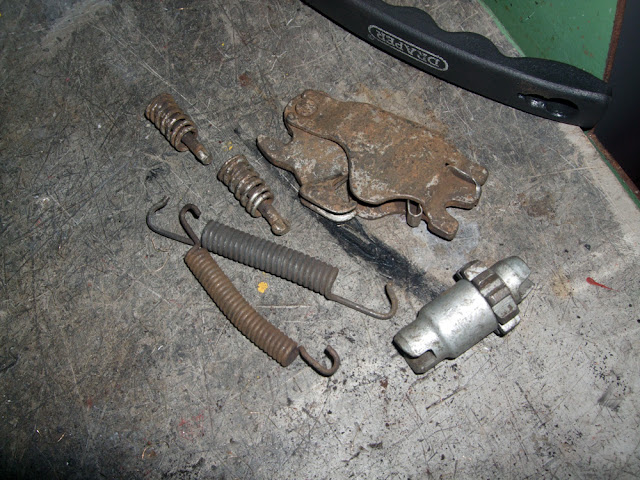
The last thing to remove (although it is not necessary to remove) is the expanding lock on the end of the cable. Simply lift one half up and the cable is released.You should have now removed all of the parts shown below. I decided to give them all a wire brushing to clean them up. Alternatively, if you deem them beyond repair you could purchase new parts (OEM part numbers listed at the start of the guide).
Before
After
You can also see the shocking state my old brake shoes were in, one side was completely worn right down to the metal, no wonder it wasn't working!


Step 8
Reassemble your parking brake with new brake shoes and the cleaned up (or new) components. It should now look like this.
Before continuing to step 9, please refer back to my E46 Rear Brake Discs and Pads Replacement guide, and follow steps 8-10.
Once completed, continue with the step 9 in this guide.
Step 9
You can now adjust the handbrake. Firstly make sure the disc can spin freely, if it does - carry on. Take a thin flat head screw driver, poke it through one of the wheel nut holes and locate the adjusting screw of the parking brake assembly. Looking at the disc, the adjusting screw is about 2 - 3 o' clock on the passenger side, (left hand side) or 10 - 11 o'clock for drivers side (right hand side).For the drivers side (right hand), turn the adjusting screw towards the centre of the disc, for the passenger side (left hand) turn it away from the centre. This will make more sense when you are doing it. Adjust the adjusting screw until you can no longer turn the disc under force.
Step 10
When you can no longer spin the disc, stop adjusting the adjusting screw in that direction, and go the opposite direction 10 teeth / clicks.Step 11
Replace the rear brake assemblies and the rear wheels. Moving to the inside of the car, pull the handbrake lever several times to seat the cable. From fully dis-engaged pull the handbrake up two clicks. Then tighten the two nuts equally until the rear wheels turn with moderate resistance.Step 12
Release the handbrake, then turn the ignition on. The handbrake warning light should come on when the handbrake lever is pulled up one click.Your handbrake is now adjusted and ready to go, although when first driving the car you should probably bed the new shoes in a bit, there are several suggested ways of doing this which you can find on the net.
Final thing, replace your handbrake lever gaiter, lower the car and re-torque the wheel nuts up to 120Nm (88ft-lb).


1 Comments
nicely exlained made it a bit easier for me thanks u missed out on assrmbly though which can b trickeir than takin them off
ReplyDeletePost a Comment
Let me know what you think by leaving a comment below.